Best way to create a splash screen in Xamarin.Forms Android project
It is vital for every mobile app to have some sort of indication of the fact that the app has been started and it's loading the content. Ideally, the waiting time would be reduced to 0 and user would see the landing page of the app straight after hitting the app's icon.

It is vital for every mobile app to have some sort of indication of the fact that the app has been started and it's loading the content. Ideally, the waiting time would be reduced to 0 and user would see the landing page of the app straight after hitting the app's icon. The reality is, that there's always a bit of time where things need to be initialized before they can be shown. That's exactly where the splash screen comes into play.
The above is especially true with the Xamarin.Forms. Yes, we all have whinged about it at some point... Unfortunately, there's not much you can do about the app start times besides trying to turn on the AOT and giving a shot any of the 5 ways described in the blog post by Xamarin.Forms PM David Ortinau to boost these values. Even if you succeed with any of the above and the app will load faster, it will still need some time to fully load and show user the content. Meaning, that you will require a splash screen.
Implementation
To show the splash screen we will use the Theme property of the Activity attribute. We will need to use the Activity that's marked as the MainLauncher - usually it will be the MainActivity. The initial code for the MainActivity will usually look like this:
using Android.App;
using Android.Content.PM;
using Android.OS;
using TabbedPagePlayground.UI;
using Xamarin.Forms;
using Xamarin.Forms.Platform.Android;
using Resource = Android.Resource;

namespace TabbedPagePlayground.Droid
{
    [Activity(Label = "TabbedPagePlayground",
              Icon = "@mipmap/icon",
              Theme = "@style/MainTheme",
              MainLauncher = true,
              ConfigurationChanges = ConfigChanges.ScreenSize | ConfigChanges.Orientation)]
    public class MainActivity : FormsAppCompatActivity
    {
        protected override void OnCreate(Bundle savedInstanceState)
        {
            TabLayoutResource = Resource.Layout.Tabbar;
            ToolbarResource = Resource.Layout.Toolbar;

            base.OnCreate(savedInstanceState);
            Forms.Init(this, savedInstanceState);
            LoadApplication(new App());
        }
    }
}
In the above code you can see that we're assigning @style/MainTheme to the Theme property of the Activity attribute. This means that the theme of this activity will be whatever style is defined in your Resource/values/styles.xml file under the MainTheme key. There's no problem with that, besides the fact that currently when launching the app, you will get an empty screen with a background color of whatever is specified for the android:windowBackground property. If you haven't set it in your MainTheme style, then it will most likely default to white.
See how the launch of the app looks like when the android:windowBackground is set to black and the background of the landing page of the app to white. I'm deliberately setting these as different colors to show how long the splash screen is visible to the user, before the actual page is loaded.
Now, let's update this boring black splash screen to include a logo in the middle of it.
We will start from creating a splash screen theme in the styles.xml file. It will be a separate style from the already existing ones.
<style name="Theme.Splash"
       parent="Theme.AppCompat.NoActionBar">
    <item name="windowNoTitle">true</item>

    <item name="colorPrimary">#2196F3</item>
    <item name="colorPrimaryDark">#1976D2</item>

    <item name="android:windowBackground">@drawable/splash_screen</item>
</style>
Few things to notice here:
- The name of the style is
Theme.Splash, we will set it later as theThemeon theActivityattribute - We're inheriting from the
Theme.AppCompat.NoActionBartheme and we're setting thewindowNoTitleproperty to true. With these two we're sure that we won't have the action bar and the title of the activity showing on the screen - Remember to define
colorPrimaryandcolorPrimaryDarkas these will be responsible to set the the color of the app bar. Read more about it here and here. - Setting the
android:windowBackgroundproperty to a drawable that's defined in aResources/drawable/splash_screen.xmlfile
The splash screen drawable code is very simple,
<?xml version="1.0" encoding="utf-8"?>

<!-- The android:opacity=”opaque” line — this is critical in preventing a flash of black as your theme transitions. -->
<layer-list xmlns:android="http://schemas.android.com/apk/res/android"
            android:opacity="opaque">
  <item android:drawable="@color/splash_screen" />

  <item>
    <bitmap android:src="@drawable/logo"
            android:tileMode="disabled"
            android:gravity="center" />
  </item>
</layer-list>
it defines two things. First is the background color @color/splash_screen and the second is a bitmap with an @drawable/logo image set as its source. The splash screen color is defined in the Resource/values/colors.xml file
<?xml version="1.0" encoding="utf-8"?>
<resources>
  <color name="splash_screen">#FFFFFF</color>
  ...
</resources>
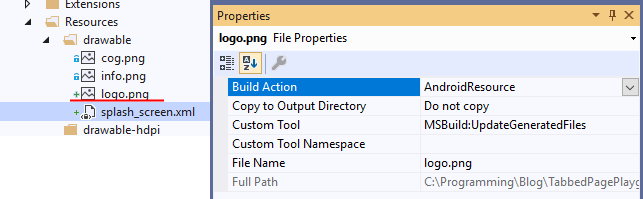
The logo file has been included in the project as an AndroidResource in the Resources/drawable folder
Refer to the official docs for more information on why the splash screen drawable is structured in this particular way.
Once we're done with the above then we need to go to our MainActivity and set the Theme.Splash as the new value for the Theme property in the Activity attribute.
using Android.App;
using Android.Content.PM;
using Android.OS;
using TabbedPagePlayground.UI;
using Xamarin.Forms;
using Xamarin.Forms.Platform.Android;
using Resource = Android.Resource;

[assembly: ResolutionGroupName("AppEffects")]

namespace TabbedPagePlayground.Droid
{
    [Activity(Label = "TabbedPagePlayground",
              Icon = "@mipmap/icon",
              Theme = "@style/Theme.Splash", // <-- Updated
              MainLauncher = true,
              ConfigurationChanges = ConfigChanges.ScreenSize | ConfigChanges.Orientation)]
    public class MainActivity : FormsAppCompatActivity
    {
        protected override void OnCreate(Bundle savedInstanceState)
        {
            SetTheme(Resource.Style.MainTheme); // <-- Added

            TabLayoutResource = Resource.Layout.Tabbar;
            ToolbarResource = Resource.Layout.Toolbar;

            base.OnCreate(savedInstanceState);
            Forms.Init(this, savedInstanceState);
            LoadApplication(new App());
        }
    }
}
The last thing to do after that is to update the activity Theme to the old MainTheme, with all the goodies that you need from your custom theme. Do it by invoking SetTheme(Resource.Style.MainTheme) method in the OnCreate method.
The final result is as follows:
The code for the above can be found in this GitHub repo